Menu-Render Motion
Previously, we learned how to create a simple motion menu where we replaced the background still image with a motion video clip. What we got was more or less a motion background with a subpicture over it.
You can certainly choose to prepare your motion menu in a separate video editing program such as Premiere or Vegas. There is also a simple and effective way to build a motion menu directly in DVD-lab with the utilization of an external encoder application.
The Render Motion feature will allow you to merge the static graphics (images, background, buttons) with a motion video (thumbnails, motion backgrounds). One application would be to simply combine the background video with static object on top. Another application can be to create motion menu thumbnails, for example.
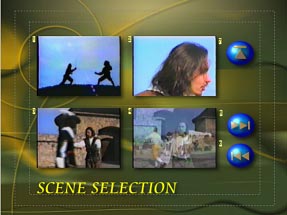
Imagine a scene selection menu as above. The Render Motion feature allows you to merge the video clips from different parts of one or more movies with the other static elements.
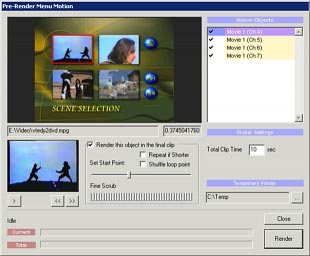
The Render Motion feature will recognize all objects which can be possibly motion thumbnails (images linked to movie or chapters, video stills) and lists these in the Motion Objects list.
Now by selecting each motion object you can set other parameters to the partial clip:
1 - Render this object. This determines whether you want to use the motion object in the final menu or not.
2 - Set Start Point of the motion clip. By default this will be at the chapter point the clip links to.
3 - Fine Scrub, set the Start Point more precisely.
4 - Set other options, see below.
You can set these parameters for each of the motion objects.
Total Time
This sets the length of the produced motion menu. A typical motion menu is about 10 - 30 sec long and then loop.

Render
After you click the Render button, you will be asked to create the final rendering. DVD-lab will allow you to create an uncompressed AVI format video file only, which you then need to encode to MPEG-2 format with the MPEG encoder of your choice.

There are two steps in rendering. First, all of the frames will be extracted from the video clips. Then, these frames will be assembled together with static objects into a final menu video.
After that, you need to Encode the AVI into a DVD compliant MPEG-2 file as an Elementary Stream by using an Encoder of your choice. Then, load the resulting MPEG file into the Assets bin:
and then Drag & Drop this new file from the Assets bin into the menu, which sets this video to be the Menu Motion background.
You don't have to delete any objects from the menu, just keep them there. If a motion background is defined with no objects (except the motion background and Subpicture) it will be visible.
Compile the DVD, and you have your first real Motion Menu done.
![]() Repeat if Shorter.
Repeat if Shorter.
If a motion object is shorter than desired total time you can let it loop during the total time. If you don't set the Repeat if Shorter, then after the motion object play is completed, the rest of the clip would remain still showing the last frame. If you set Repeat if Shorter ON, then the object will repeat (loop) within the total time. Of course, if the motion object is longer than the Total time, then this has no effect.
![]() Shuffle Loop Point, seamless looping
Shuffle Loop Point, seamless looping
When you play the motion menu, it will loop. So every Total Clip Time (for example 10 sec) you will see a jump in all the thumbnails since the last frame of any thumbnail will change back to the first frame:
You can see on the picture above, that all the thumbnails will have the loop point at exactly the same time when the menu loops. The effect is a bit annoying and quite visible. Most Hollywood productions do their motion menus (if any) this way. With DVD-lab, we can do better than that. DVD-lab has a totally unique "Shuffle loop point "option to fix this "problem".
What Shuffle loop point does is that for each thumbnail with Shuffle loop point checked, DVD-lab will offset its playback to have the loop point in different time spots than others.
You can see from the image above that when menu loops none of the thumbnails will be in a loop point by itself. Since each thumbnail will loop in a different time the effect is that you can't visually tell during playback when the menu loop occurs. It appears as if the menu is looping seamlessly.
In real life, this is a priceless feature for anybody who creates thumbnail motion menus.
How to set Shuffle.
We need to set the Shuffle loop point for each thumbnail.
You can either do this by selecting the motion object and checking the Shuffle loop point box or you can do it by clicking on the space between the check mark and text in the Motion Objects list. You will need to click twice, since the first click will just set the Repeat if Shorter option.
Then Render the motion menu again. Now, when you play the menu in a loop you will not really be able to tell when the looping occurs since each thumbnail loops in different time duration.
Note: This is just one example of how to use the Render Motion tool. Because of its simple, but effective principle, you can create many other types of motion menus. Also note that you can select different effects for video thumbnails and other objects such as Display mode, transparency Lens flare or 3D rotation so the result can be unlike any plain old motion thumbnails menu.
The Render Motion feature together with the menu editing capability of DVD-lab make it one of the most powerful motion menu solutions in any DVD authoring software.