![]()
In DVD-lab PRO, the connection window is the most important. Therefore it is highly customizable and offers many settings and helpers.
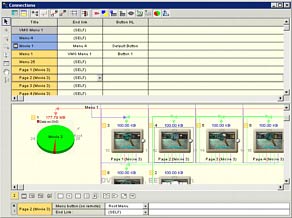
Table View

Connections - Show Table
Connections can be switched to Table view with the Table button.
The table view shows and allows you to change the end links of all objects.
Split View

Connections - Split View
A Connections window can be split to two windows where each can show different part of the structure and each can have its own settings such as zoom for example, table view, size view etc...
|
|
This can help you to better navigate and edit objects in connection view.
Snap to Grid

Connections - Snap to Grid
Snap to grid will place a grid on the connection window which will help you to organize the objects by snapping them only in between the grid space. It also adds a column header on top (letters) and row header (numbers) that helps navigate in large projects.
Jump Links, Button Links and lines
![]()
These buttons are for showing or hiding a few types of lines that link objects. Jump links show/hide the end connection links and Button links show/hide the links that come from menu buttons.
The lines may be straight or right angles.
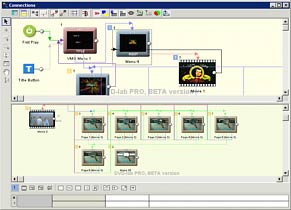
Place VMG vertically
Using this button will place new VMG vertically instead of horizontally as the VTS menus. It will also start adding movies into second column rather than first.
The image above places VMG menus vertically. The image below places both VMG and VTS menus in same row.
Link Assist

Link Assist is a great helper for adding links. When selected, using link tool will visually disable objects to which you can't link from the object.
In this example we see that we can't link the VMG menu with anything other than the ROOT VTS menu.
![]()
Various info tools are provided to give better information.
Color Code Background for VTS - This will put a color coded background to all objects so you can quickly see to which VTS they belong.
Show VTS - This will show a VTS number on colored rectangle in the right top corner of each object.
Show Item Order - This shows a virtual item order in that VTS.
![]()
Show PGC Number - This shows the true PGC number instead of item order. This number can be later directly used in VM commands for PGCN links. The PGC Number is always shown as red. The PGC number on Menus and VMG menus is 1+item order because of the special invisible first menu.
![]()
Show Node - This will show the in/out node number that can be later used in VM commands. The image below shows that the Movie object has In node 12 and Out node 13.
Show Size - This will show a size in MB that the object takes from DVD.
Show Average Bitrate - This will show average bitrate of movie objects.
Pie graph - Shows the relative part that the movie takes from the DVD.
Show VM Commands
Each object can show PRE/POST VM commands in the connection window.
![]()
The Show VM Commands have 3 states. Pressing it once will show all VM commands for the selected object. Pressing the button second time will collapse the Abstraction Layer and show only custom commands. Third state is all commands off.
Collapsed Abstraction Layer.
This button is only for displaying the VM commands. The commands (at least the Abstraction layer) are inside the object, even if they are hidden in the connections.
This opens a Quick Link Info bar at the bottom of connection window.

VTS selector
![]()
A VTS selector is a special button that shows which VTS is currently selected. The selected VTS is also highlighted in blue in Project.
![]()
Clicking on the VTS selector will cycle through existing VTS so you can quickly add object to desired VTS with the add buttons on right of the VTS selector.
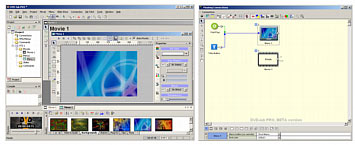
Floating Connections Window
Connection - Floating (Multimonitor)
Normally the Connections Window is inside the DVD-lab interface between all other windows in what Microsoft designers call a Multiple-View Interface. That is fine as long as you have only one monitor. For multiple-monitor workstations we added the possibility to remove the Connections window from the DVD-lab PRO interface and place the Floating Connections beside, preferably in a separate monitor.
To create Floating Connection window, click the Floating (Pin) button

A Connection window will be "removed" from DVD-lab PRO interface and could be now positioned anywhere on the desktop or secondary monitors.
To put the Connection back to interface, click again the Floating (Pin) button.
