|
Noise Removal |
  
|
|
Noise Removal |
|
RGB Noise, Dust and Hot Pixels removal
Noise removal is important task in many image processing jobs. Most of the noise (including dust and scratches) is usually in scanned material (such as scanned photography or film) Digital brought us one big advantage: digital image is free from dust and scratches. However digital images have its own specific problems such as RGB noise in bad light conditions and Hot Pixels in very long expositions.
Dust and Scratches
Virtually any scanned image will have some amount of dust. Dust, while not visible on the film or photography with naked eye, is a reflexive for scanner producing visible white dots on the scanned image. Scanning from negatives will usually produce less dusty image because we usually keep the negatives in tight closed space for most of the time. Any photography, especially old will probably have great amount of dust.
What to do before you start scanning:
1. Make sure you take most of the dust from the photo before scanning. You can blow on photo or use antistatic cloth (Never use any wet cloth). Use this only with photos never with negatives.
2. Make sure your flatbed scanner is clean from dust or fingerprints. These may be not visible by naked eye.
Important: For negatives and film scanners NEVER use blowing or anything which touch the negative (cloths not even a brush). Contact manufacturer of your film scanner for recommended way (or kit) how to clean the scanner and negatives.
Removing Dust with Photo-Brush.
Even if you take care of your photos and scanner you will probably get some dust in your scanning. We build a special Dust Removal process in the Photo-Brush. This special Photo-Brush dust removal algorithm (created by the author himself) is highly sensitive to scanner dust and it could remove it in large amount without much affecting the rest of the image.
Menu: Filters-Noise-Dust Removal (or Auto Dust Removal button in the Scanning bar)
|
|
Detail of image from scanner |
After Dust Removal applied |
Removing Scratches
To remove scratches you can use a Scratches brush from the Photo Retouch Tools.
Hot Pixels Fix
Some of the more expensive cameras lets you to extend your exposure time even for few seconds (Sony 505V up to 8 sec).
When you actually try it, your image will be .... full of tiny little white dots, all over. These are Hot Pixels.
What is Hot Pixel
Each CCD has millions of pixels sensitive to brightness. These pixels are on a very small space. In consumer cameras this would be somewhere below half an inch. These pixels are never the same and each of them has different charge leakage rate.
If you expose the CCD long enough, the pixels thanks to this leakage will simply lighten up even with no light. (Any photosensitive silicon material is sensitive not only to light but to charge as well)
Because of different quality and sensitivity of each pixel, they will start appearing as a noise - but if you would able to expose for much longer, finally all pixels will lighten up.
Many consumer digital cameras don't have longer exposure times - and this is always because of Hot Pixels (80% of people would think that the CCD is defective). Today CCD's are reasonable up to 1-2 sec of exposure. (It depends on a temperature as well - remember, more heat, the electrons are vibrating faster - more of them will escape from wherever they are - more charge leakage)
Some cameras (Canon G1 as example) which allow for longer exposures have also some simple hot pixels aware algorithm which will usually cover the pixels with black dot. This is not exactly right (the dots are visible on the image), but on the night image the black dots are much less disturbing than white dots.
In Photo-Brush we added better solution to this common problem - Hot Pixels Removal algorithm.
Menu: Filters - Noise - Hot Pixels Fix
|
|
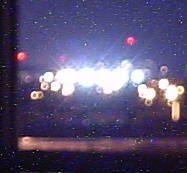
Detail of 8s night shot |
After Hot Pixels fix was applied |
RGB Noise
RGB Noise, unlike the Dust or Hot pixels produces a darker RGB dots all over the image. If it appear in large amount is usually pretty bad problem - simply because if the whole image is too noisy you can't really remove it without affecting the image. Noise will appear in bad light conditions where digital camera uses higher ASA settings. (200, 400...). Because such random RGB noise will cover the whole image it is impossible to remove the noise without visibly changing the image.
|
|
Typical detail of a RGB Noise |
After the Despeckle |
If the image has not too much noise you may:
1. Use Despeckle in the Filters-Noise menu. You may try to repeat it more than once.
2. If the Despeckle is too strong use DCEnhance Extras (in the Image-Extras menu) which allow various degree of de-noising. Don't forgot to check the image in full detailed view and select amount which produces less visible artifacts.
If the image has a lot of RGB noise you may do the same as above but be prepared that the image will change rapidly. It may be noise free but it will probably look more like drawing than photography.
Of course the best solution (if possible) is to try to shoot the image again with more light.