|
Special Effects Brushes |
  
|
|
Special Effects Brushes |
|
The Special Effects button opens the Special Effects Bar.
With special effects you can add emboss, shift colors, warp add mosaic, add lens flare etc.
The difference between Filters and Special Effects, is that with the Filters you apply the effect to the whole image, whereas with Special Effects you actually paint the effect. A few of the Special Effects also have a whole-page version in Filters.
Swap R-G-B channels. By randomly painting over an area a few times you can create a rainbow texture. You can also use it to change clothing color...
|
|||||||||
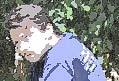
Create an Aged Photo Effect with all the 1920 scratches, noise and brownish look. And because this is a brush, you can affect only the exact part of the image you want.
If you want to apply the effect to the whole image you can use a filter in the menu Filters->Stylize->Aged Photo which produces very interesting effects to the complete image |
|||||||||
Emboss an image where you paint. It can add a texture look to smooth images.
|
|||||||||
Create Mosaic where you paint.
|
|||||||||
Create poster like effect with Pastel colors
|
|||||||||
Create an effect of motion (radial zoom inward) blur from any point from that you click and drag.
|
|||||||||
Create an effect of image behind glass
|
|||||||||
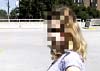
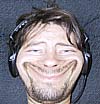
Make funny faces with this tool. Warp lets you grab a part of the image and stretch it. And of course you can use it for more serious work as well.
|
|||||||||
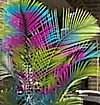
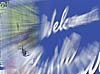
It creates an interesting neon effect, where edges glow in different colors.
|
|||||||||
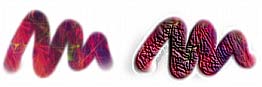
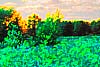
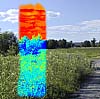
Simulates Thermovision. However, you can in fact, use it to reveal some unseen details of an image. Such effects are used in geographic satellite photography. The normal colors are replaced with the spectrum palette.
|
|||||||||
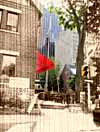
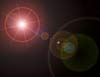
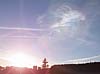
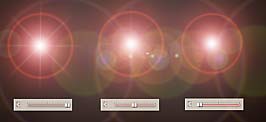
Add beautiful Lens Flare effects. The Lens Flare is most visible on dark images where it creates amazing light effects. To add Lens Flare, click on the Flare button and then click on the image where you want to have the center of the flare. Do not release the cursor, instead, drag it from the centre, creating the size of the flare. You also control the angle origin of the light streaks.
|
|||||||||
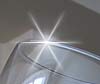
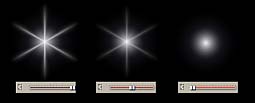
You can add Sparkles the same way as the Flare
|
|||||||||
This brush paints back the original of the image. The original is defined when an image is loaded from the disk (such as digital photography). Original is not defined if you start painting into a new document, however, at anytime you can set or define a new original of the image from the menu Image > Set as Original. You can also paste a completely new original with Paste as original in the menu Edit. You can use Original brush not only to regress if you make a mistake, but you can also try a reverse process, where you can apply the effect to the complete image and then paint back areas which shouldn't have the effect. See also Eraser tool for tips. Example:
|