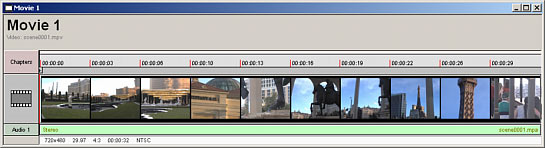
A Movie window is the place where you add a single video clip and its audio channel(s). You can have many video clips on DVD, but you need a separate Movie window container for each of them.
![]()
A Movie window has a place (a track) to put a video clip, audio file and a way to enter Chapter Points.
Add Video
To add video, Drag & Drop the video elementary stream file from the Assets bin onto the Movie video track. A thumbnail of the video will be quickly generated over the entire length of the video.
Add Audio
To add audio, Drag & Drop the audio stream file from the Asset bin onto the Movie audio track.
To delete Audio or Video
Select the item on the Movie window which you want to delete and press the Delete key on your keyboard.
Scrolling through the video
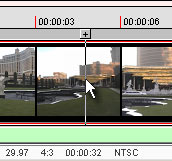
Click on the Video represented by a series of thumbnails and drag the video cursor. Watch the preview window as you drag the cursor.
 |
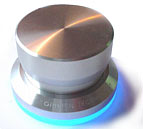 |
You can slow scroll by I-frames with keyboard arrows: left and right. Alternatively, you can use an external jog/shuttle controller such as Power mate (above) or any other controller device which can be assigned to the arrows.
You can also use I-Frame buttons on the Preview Window.
![]()
Zoom
You can zoom in or out of the screen with the zoom buttons found on the main toolbar:
![]()
Click either the zoom in (+) or zoom out (-) tool, then click in the Movie area to zoom in or out of depending on the tool you selected. Zooming in will enable you to more precisely set the Chapter Points in a long movie.
Note: Video is the main stream in a Movie container. Normally, the video and audio of ordinary video clips are of the same length. However, if the audio is longer than the video (for example you add a background music clip to your splash clip) the audio will be cut to the length of the video stream. If the audio is shorter than the video, then the movie will be silent after the end of the audio.
A Movie doesn't have to have audio.
See next Chapter Points