|
Color Operations |
  
|
|
Color Operations |
|
While we are tone mapping we work with image data that have far greater dynamic range than normal photo. It is therefore a great time to inject some regular image operators that would benefit from the finer dynamic details without color clipping (as in normal image operation that works with limited dynamic range).
Filter
This will set the output filter. To select from the available filters, press the Filter button which will open filter grid:
![]()
The output filter can be: Color, Black/White, Black/White Heavy Sky, Black/White Hard Light, Orton Effect, Sepia, Vignette, Mysterious Light and some combinations.
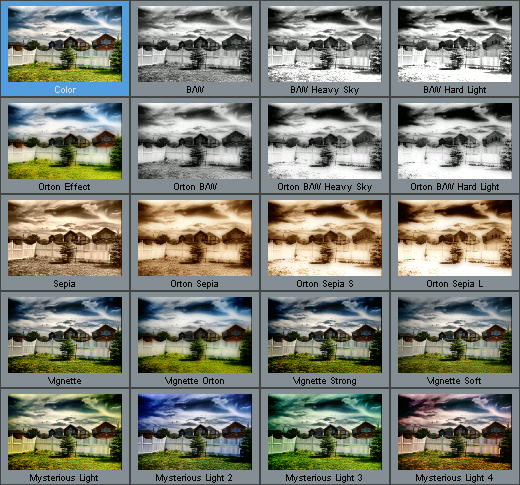
Note: To reveal more filters that are not visible in the window, click on the Filter grid and drag it up or down (or use Scroll Wheel).
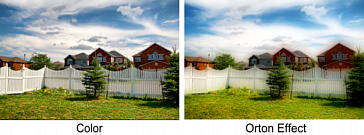
Orton Effect add a "Dreamy look" to the image. See the comparison:
Manga and Comic filters are described in Non-Photorealistic rendering
Settings
Some Filters have additional Settings. The Settings button will appear near the Filter button as an "S".
![]()
Pressing the S button will reveal settings for the effect.
A typical example are various B/W effect where the additional settings will allow you to mix the RGB channels to produce the B/W image or to control Orton parameter..
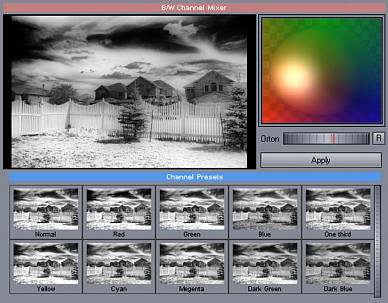
In the B/W Mixer window we move the Light Orb to mix the RGB channels to obtain desired Black and White effect.
Gamma
The first one is Gamma, that controls the shape of response curve from its initial linear state (where gamma = 1.0). Moving the dial right will brighten mid-tones, moving the dial left will darken the mid-tones. This is the best way to control the perception of the overall image brightness so it looks good on the computer monitor.
Curves
An operator that adjust the response curve. Unlike gamma that changes the curve by logarithm, with curves you can actually draw your own response curve.
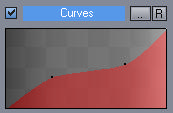
Working with the graph is simple, just move your mouse around and you should see a whit point sliding across the curve, click and then you can move the point of the curve up and down.
To move the same point again, move across the curve and watch when the white point snaps to the curve control point. Then click and drag the point up or down.
To delete point, right-click on it.
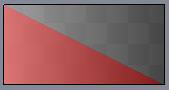
The Curves have hidden points at the ends.
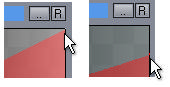
You can move the start and the end up or down, or you can even reverse the curve to get Inversion:
[R] - Reset the curve
[..] - Random button, it will just randomly generate a curve
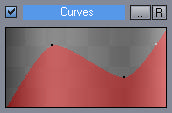
You can use it for adjusting the response curve, but also for some special effects. In this example we created a solarizing effect:
Color Equalizer
Changes the saturation of certain hues determined by the curve. Points below the middle line will reduce saturation (desaturate), points above will increase saturation.
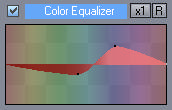
In this example above we gradually added more saturation to blues.
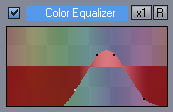
The Color Equalizer has hidden points on the left and right edge. They are linked together. You can use them to move the start and end of the curve (or the whole line if there are no other points) up or down..
In the following example, that is more of an effect, we actually decreased saturation of all colors and increased blues.
[R] - Reset the curve
[x1] - Switch that multiplies the value, it could be x1 or x2.
Hue Shift
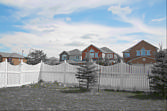
This will shift the hues as defined by the curve The middle line marks where the hues are all correct. Moving points up and down will shift certain hues towards different colors.
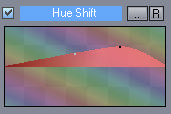
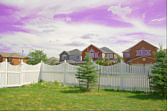
In the example we shifted blues more toward red color, but other colors (greens, yellows) remain almost unchanged.
The Hue Shift has hidden points at the left and right of the curve (some as the Color Equalizer above).
[R] - Reset the curve
[..] - Random button, it will just randomly generate a Hue Shift
Vivid Color (Linear/Hyperbolic)
Pressing a small arrow on the Vivid Color Settings will let you choose the Vivid Color response curve as either:
- Linear - creates bright vivid colors
- Hyperbolic - creates full (strong) colors