|
Enhancements |
  
|
|
Enhancements |
|
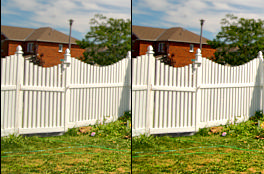
Add Clarity
This will add clarity to the image by correcting the color run of common Bayer CCD sensors. The effect is quite subtle on both preview and final image. You can however focus your eyes on just one busy area of the preview (like a foliage) and then switch the box on and off to spot the difference.
De-Haze
This will remove haze from the image and somehow improve the perceived contrast or "punch" of the image. (The contrast is in fact not adjusted)
360 Pano
This option will process the image with a special care about the seamless blending of the left and right edges.

The requirement is that the input image is already prepared as seamless 360 Panoramic image. The process will then ensure that even after tone mapping with local operators the result image will still remain seamless.
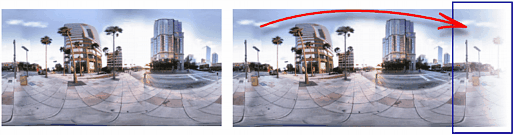
This will be done by first partially repeating the image, then during the final export this redundant part will be blended back to the left side ensuring a seamless blend. The final saved image will be at the end the same size as the source image.
Note: This option will have no practical benefit on images that are not seamless 360 Panoramic images
NR - Wavelet Noise Reduction
This uses a fast application of Wavelet NR to reduce the most visible noise.
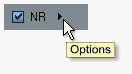
Press the Arrow near the NR checkbox to reveal the settings and Preview in 1:1 zoom to evaluate the effect
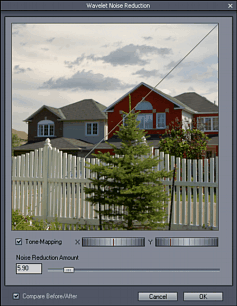
Simulate T-M (Tone-Mapping)
Normally the image 1:1 crop is displayed without any Tone-Mapping. Checking the box will apply Tone-Mapping to the crop visible in the window to see how the tone-mapping may affect the noise.
Because the real tone-mapping in Dynamic Photo HDR depends on the whole image (and it will take too long to tone-map the whole image), what you see here is not what the detail of final tone-mapping will look like. It is however a good approximation in order to evaluate the noise.
Noise Reduction Amount
Increasing the value will increase the amount of noise reduction
You have to be careful not to over-do the noise reduction as high settings will reduce the sharpness of the textures.
Kelvin
Kelvin refers to the temperature of source light in Kelvin. Pressing the Kelvin button will reveal relative temperatures of the light source and how it will affect the image. This way you can color correct your image by the similar (but reversed) way white balance affect the image. This works as a counter-white balance, a white balance in camera set for 4000K will produce cold image under normal day-light, selecting 4000K in this Kelvin table will then negate the effect.
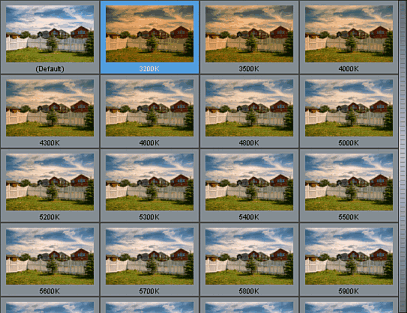
The Kelvin numbers have absolute value only if the image was taken using daylight D65 white balance. If your image had different white balance under different conditions then the numbers are relative. Without much worrying, just select the settings that visually affect the image to your desired colors.