On the tool bar Tools, select Photo Retouch
![]()
On the tool bar Tools, select Photo Retouch
This opens the Photo Retouch Tool bar with many different tools (Brushes) for photo retouching. These tools helps you to retouch an image with special selection of retouching Brushes. You can paint and it will change contrast, lighten up the image, boost colors etc.... Exactly on the spot where you painting.
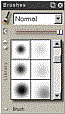
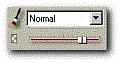
With Photo Retouch tools you have own set of Brush types in the Brushes bar. They cover the most common sizes and sensitivity. Of course you an load your own set of brushes. If you want you can also experiment with different Brush Modes beside Normal. You can try Overlay, If Lighter etc..
When you retouching photographs, remember that you can always use Original Brush, to paint the Original image back.
 |
This brush allows you to Brush-In contrast to any area of the image. You can of course change the contrast of whole image with Contrast & Brightness, but the contrast brush will allow you to brush-in the contrast to the exact place where you need it. |
||||||||
 |
This brush lighten image. With the soft brush size you can use it as a tool for creating highlights. The Lighten image will enhance the brightness of the spot where you are painting. |
||||||||
 |
This Brush darken the image. With the soft brush size you can use it as a tool for creating shadows. This tool will decrease the brightness of a spot where you painting. |
||||||||
 |
This brush changes the color into the Black and White. You can de colorize some part of the image, or just with Brush Opacity make the colors less visible. Also you can use it as a composition tool to enhance some object. You can achieve the same effect opposite way - first turn the whole image to gray scale and the use Original Brush to bring up the colors.
|
||||||||
 |
This Brush boost and enhance the colors of the image as you paint. Be careful not to over burn the image with color...
|
||||||||
 |
With this brush
you can colorize any image. Just select the foreground color
from Color & texture bar and paint on the image. This isn't
the same as simple painting over the image, coloring preserve
the details and intensity. Now you can change car or clothes
colors! If the coloring is too strong use the Brush Opacity slider
to soften the color cover. As always, if you paint over something
else, don't worry, you can anytime remove it with Original Brush.
(See the end of this page)
If you are looking for other simple way how to replace colors on image , you can use any normal brush (Paint Brush for example) and select Overlay mode in the Brush bar. This produces stronger "artificially looking" results. |
||||||||
 |
Skin brush clean
the skin. You will need to use it few times over the face to
remove most disturbing skin details. You can also try an automatic filter from Filters-Noise-Auto Clean Skin |
||||||||
 |
This brush removes thin scratches over the image. The tool is best for a film scratches, but it could remove also thin telephone cables, lines etc....
|
||||||||
 |
This is a simple yet sometimes very powerful brush. It allows you to paint a horizontal or vertical transition between 2 points. Great for removing vertical or horizontal lines or objects.
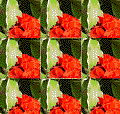
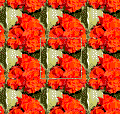
In PhotoSEAM this tool works also across the tile borders. |
||||||||
 |
This brush will
paint a Blur into the image. The blur effects is not very strong
so you should paint, then release mouse button and then paint
again to achieve stronger effect.
|
||||||||
 |
 This
brush sharpen the image under it as you paint. This
brush sharpen the image under it as you paint.The effect may be a little strong, so you can adjust it by sliding the opacity slider. |
||||||||
 |
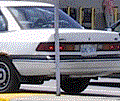
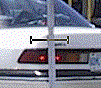
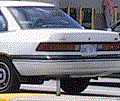
This brush paints back the original of the tile. Note: In PhotoSEAM the Original of the tile is not the whole "original" image, but just the image of the size of the tile itself. To paint the true original even across the tile borders you can use Cross-Border Clone tool instead. You can use Original brush not only to put back if you make a mistakes, but you can also try reverse process, where you can apply the effects on the whole image and then paint back areas which shouldn't have the effect. Example:
|