Package is a special "Image Group" Object. It allows to group few objects together so they will appear as a single Image Object. However the Package will also offer a separate View where we can further edit the content of the Package separated from other objects.
The Package can be used same way as any other object - for buttons, placing Group HotSpot over it etc.
To create Package, select the Package Icon
![]()
and draw a rectangle over canvas.
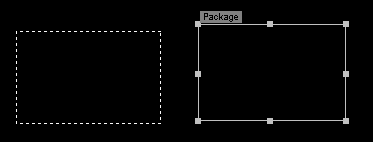
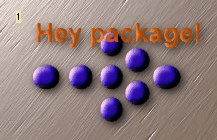
This will create an empty Package Object. A tab bar will also appear at the bottom of canvas giving us a quick access to the Main canvas or each Package.
![]()
Note: The size of rectangle during drawing Package will determine the original size of the Package.
Editing
To edit Package, double-click on it or click on the corresponding Tab bar (each package has a different color).
This will open the Package inside a new empty canvas (all other objects will disappear)
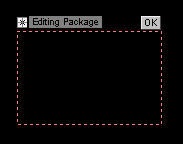
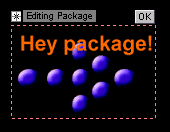
Now we can add any number of other objects inside the Package area, the same way we add the objects in main canvas.
Close Package
When we are all finished, click OK button or click "Main" tab bar. The Package will close. We will be back in the Main canvas and the Package will display both objects, while behaving as a single object.
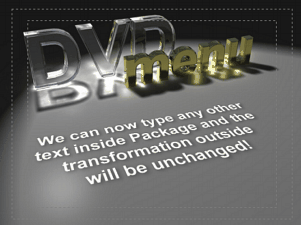
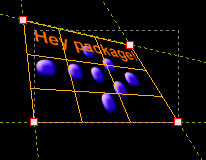
We can now apply any other effects or transformation to the Package as to any other single object. For example we can add perspective transformation,
or for example apply a texture:
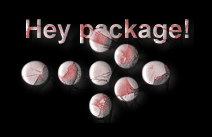
This will be applied to th whole Package.
However any time we need to edit the original Package, we can always just double click on it and we can make any changes!
Rename Package
Right click on a Tab bar and select Rename View. You can then edit new name for the Package. This name will be also stored in "Button Label" properties.
Package Background
Normally the package background is fully transparent. However while editing the package we can add a background to it as to a normal canvas.
Links
We cannot apply links to objects inside the package during editing, but we can apply link to the closed package as to any other object. We can also use the universal Group Hot Spot to pinpoint one or more active parts.
The button Highlighting will be created from the Package transparency.
Use one Package for more buttons
If you want to have more than one link over various parts of the Package, the Group Hot-Spot objects placed over the Package (not during Package editing) is all what you need.

Place Group Hot Spots over the desired parts of the closed Package you wish to have as a separate button, then add different links to these Group Hot Spots (not to the Package itself!)
As described in previous chapter, the Group Hot-Spot will pick-up the underlying parts from the Package as the Highlighting.

Note: If you have any other objects below the Package that you don't want to show as part of Group Hot-Spot highlighting, set these objects to Invisible Selected.
Shadows inside vs. Shadows Outside.
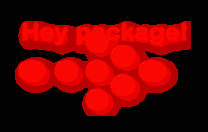
When we apply shadow to the objects inside package, they will become a part of the image.
If we apply link to the Package, then the Highlighting will be created also from the part of shadows (because it is now part of the top image) . This may not always be what we want:
If we are planning to use the Package also for buttons and want drop shadows, it is better to remove all the shadows from objects inside the package and add the shadow to the package as whole.
Note: By default objects created inside the Package will be applied without shadow.
Cells and Package.
A Package belong to only one cell. Each menu cells can have different own set of Packages.
Usage Tips:
For parallax images you can create a package and then apply perspective transformation to the whole Package which is far easier than trying to fit each object into scene separately.

And the best thing is that when you need to change the text, just double click on the Package or select its Tab, change the objects inside and go back - the perspective transformation will be intact.