|
Advanced Options |
  
|
|
Advanced Options |
|
By clicking Advanced Option button we can change the parameters how HDR file will be merged from the source files.
This is mostly for people who like to experiment or refine the way HDR is created.
Exposure weighting function
This sets the weight curve of new exposure range. A weight curve specify the importance ("weight") of each pixels for inclusion in the final HDR image. The goal of weighting function is to give preference to properly exposed pixels rather than over or under-exposed ones. This eliminates most of the noise and clamping that is usually part of under and/or over exposed pixels. The weighting function allows us also to completely exclude part of the source dynamic range, for example we can move the right-most point on the graph toward the graph center thus completely eliminating any over-exposed (and clamped) pixels. (See the example at the end of this topic)
On quality images changing the graphs may not have very big visual impact. The weighting function power is in the subtle changes of adjusting linearity of dynamic ranges going from the source images to the result HDR.
Smoother Output
This is good for most of the images. The result will better hide misaligned edges
Sharper Output
This process will produce sharper images, but any misaligned edges will be also more pronounced.
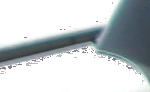
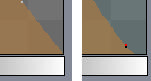
Here is the difference between processing (1) Smoother, (2) Sharper on a misaligned image (1:1 pixel view):
Custom
You can draw a graph of new weighting function. This refines the way how the pixels in different exposures are weighted.
The horizontal scale represents the whole dynamic range. Normally you would prefer more pixels from the center (where the image is well exposed) than pixels from the sides (under/over exposed).
Few examples of weighting function:
(1) Hat function that cuts off only the extreme over/under exposed pixels
(2) Over-exposed fix - for example if all exposures have certain over-exposed parts, you may want to cut the over-exposed pixels much earlier.
(3) Gaussian function favors more center of exposure range.
(4) Pyramid function - linear attenuation of exposures
Unless you closely watch the result pixels, you will not see dramatic changes in the final HDR.
Inverted Camera Response
This compensate for the camera response to different light intensity. Normally the camera response is never linear and the inverted (compensation) curve looks more-like the gamma function below.
For our practical purpose it is not very important to actually set the exact response curve of your camera. (It is more important for scientific purpose)
Normal Camera
Sets a soft Gamma function as the Inverted response curve. This is a good average to compensate for normal camera responses.
Ideal Camera
Sets a linear camera response curve. (No compensation)
Custom
You can set a custom camera curve for various experiments. The shape of the curve will quite dramatically change the way HDR image is assembled. The effect could be similar to changing the Curves in most Image editing applications. (However a purpose of assembling HDR image is not to adjust its curves at the assembly stage, but in fact to compensate for the non-linear camera response. We can (and should) adjust the curves later, during Tone Mapping operation). But still, it is a certain way to experiment with the images.
The Quick HDR preview will immediately show you the result on a merged and tone-mapped HDR of the various settings and curves. This is especially good for the Custom Weighting and Camera Response graphs.
Example of Custom Exposure Weighting Function
The goal of having multiple exposures for HDR is that each exposure will try to properly capture part that is either under or over-exposed on the normal exposure. However in some cases even the additional exposures will not be enough and there will still be areas that are extremely over or under-exposed.
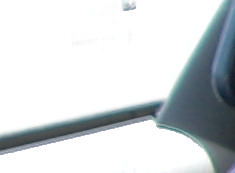
Here is such an example:
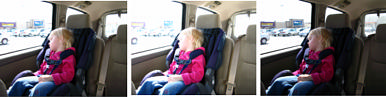
On the images above we see that all of the images are overexposed in the area behind the window. Particularly the last image that used negative -1 EV is still overexposed on that part (many areas are still pure white). For a good range on HDR we would need to underexpose even more (-3 EV for example) during the last shot. Unfortunately we didn't.
If you use the Quick Preview or go to the Advanced Options you will see that in these extreme areas there is a noise on the Preview HDR image.
The merging function has simply not enough range to produce the HDR image. In these extreme values there is so little data that even smallest change in the range will produce unwanted jump in the dynamic values resulting in this noise.
To fix this we can use Custom Weighting function to clip the extremely overexposed bytes.
First we will start with a bell shape curve:
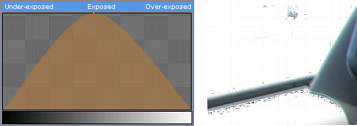
This may even more pronounce the noise than any of the default setting, but that is just fine for now.
We will create a point near the right side of the curve (in Overexposed part) and move it down so it will cut to the horizon a bit earlier.
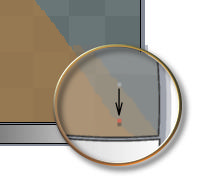
This will clip out the still over-exposed bytes during merging the final HDR image.
The result HDR image has no noise now. (It is still over-exposed however, but we cannot fix this unless we are able to re-shoot the image with -3 or -4 EV)
Note: Images that do not cover the whole dynamic range will make poor Tone-mapped results.