|
Brigtness/Contrast |
  
|
|
Brigtness/Contrast |
|
Menu: Adjust -> Brightness/Contrast...
This dialog allows you to change the contrast and brightness of an image, either simple way or adaptively using advanced Lightness Graph.
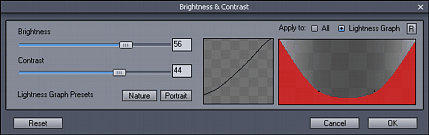
As you move the sliders, you can immediately see the results on the original image. The Tone Curve shows you the Input/Output relations as well. On the X axis are the values of original image, the Y axis displays the adjusted values of the result image.
Contrast is the difference between light and dark tones. As you move the Contrast slider up, you will see that the tone curve angle changes and becomes more vertical. This means that more values around the mid-tones from the original image are mapped into a larger tonal scale (stretched around the gray mid-tones) on output.
Brightness moves the tonal curve up and down, thus shifting the input image more toward a bright or dark tone.
|
|
|
Original |
Adjust Contrast |
Result |
Lightness Graph
This is a way to seriously change the adjustment curve.
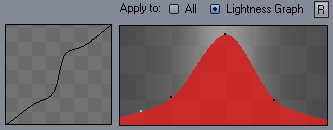
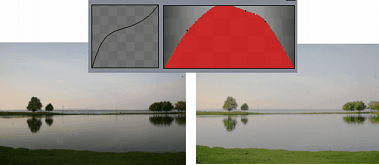
The graph determines how the Brightness/Contrast settings apply to the image. On the image above we set the graph that it applies the settings very little for dark tones and light tones, but much more for middle tones.
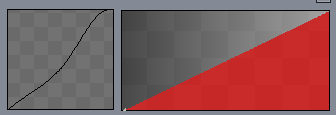
In the next example we apply the current Brightness/Contrast settings (whatever it is) gradually from zero in dark tones to full in light tones.
Lightness Presets
A few presets are available for typical lightness graphs that are straight from the toolbox of professional photographers:
Nature will create graph protecting mostly dark and light values where the increasing contrast/brightness will be mostly applied in mid-tones. This is typically to prevent highlights from getting overblown and dark tones from being clipped when using Contrast adjustments.
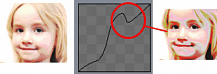
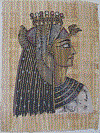
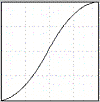
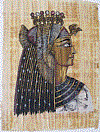
Portrait will create graph that protect mid-tones (such as skin) from any large contrast/brightness adjustments where most of the changes will be then applied in dark and light areas.
![]()
You can use such graphs as a starting point and of course use them as they fit.
Watch for inverted curve
The line graph has very important function, especially when we start using Lightness Graph. The combination of all three settings may create an inverted curve graph as pictured below. In this case it shows that the very dark tone will be actually lighter than tones that come after (the dip in the left part of the graph)
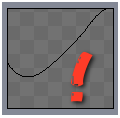
This shows as undesirable "solarizing" effect, the goal is to keep the curve without any extra local minimum/maximum dips, that is: no point in the graph should be lower than the left-most point and higher than right-most one. In this case we would decrease Brightness and or Contrast to remove the dip.
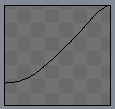
This is what happen when we have dips in the graph (overdone on purpose):