|
Mega Render |
  
|
|
Mega Render |
|
EXPORT - Advanced
Mega Render
Real-DRAW allows you to render an image in a larger size than the one that it was designed in. This is useful if you need to create an image for a large or special print.
MegaRender can save files in JPG or PNG format or in Adobe PhotoShop PSD format. In case of PSD format, each object and its shadow, will be in separate layers so you can continue to work on them in Photoshop if you need to.
See more about exporting in PSD in Export.
Mega Render will internally resize each vector object, and recursively, all the objects inside packages. Apply all the effects and lights, and then mix everything together to create the output image (in case of JPG or PNG as output). This may take some time but you will be provided with progress details.
First you must specify the size magnification factor 2x, 3x...of the original size.
Resize Texture Fills and Transparency Textures.
You have the option of deciding if you also want to resize the Texture fills applied in Color & Texture, the Transparency Textures applied in Transparency settings, or if you want to use the original.
The Texture Fills and the Transparent Textures use the same idea.
Use Original
This will resize the object, and all the effects and bitmap layers, but will leave the Texture Fills at their original size. This is great if you want to keep the number of details on objects, since textures are often used to add a natural feel to an object. For example, for posters or large printouts. The image will be similar to the original, but much larger, and with more small details.
Resize for all objects.
This will resize the texture along with the object. The texture will then appear as it did on the original image, but of course it will be in scale.
This setting will produce an image which is very similar to the original in scale and this should be used if you need an image with better resolution, but don't necessarily want to print or use it in larger size.
Note: By resizing the texture fills, you obviously don't bring more texture detail to the object because textures are just bitmaps. A solution may be to you use the texture in the original image, but scaled down. See more in the Adjusting Textures.
Resize for objects (Label):
Here is a compromise - only the Objects listed below will have the Texture fill (or transparency) resized.
This is great if you generally want to have much smaller details, but some of the textures create an important part of the message so you want to resize them.
Example:
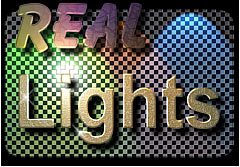
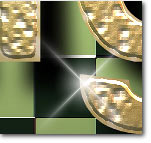
1. We used this simple, but quite nice and colorful 3D lights example.
|
|
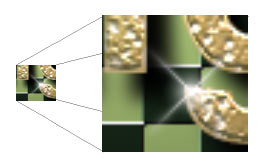
This design in its original size is 400 x 300 pixels; almost twice as large as shown here. This of course looks great on the web or a screen but isn't very good for printing on a poster |
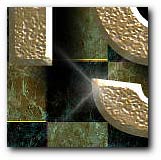
This is a small part from the image, resized 3 times. We will use this part for comparison later. |
2. For the second image we opened the Mega Render and set the Magnification Factor to 3 x, which will gave us a 1200 x 900 output image.
And for the first Image we left the default setting on Use original in the resizing Texture Fills. As we didn't use any transparent textures we didn't need to concern ourselves with the Transparent Textures setting.
|
. |
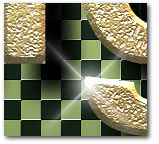
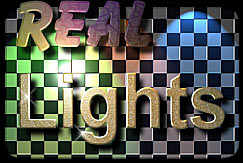
Above is how our image looked after a minute or so of rendering. It is 3 times bigger than the original, with 1200 x 900 pixels. You can already see that the image is a bit different, so let's look at it more closely. |
Above is a closer look at the image (actually it is a 1:1) |
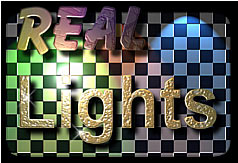
3. For the third image we used the Resize for all objects setting in Mega Render.
|
|
Above is the result. If you look at the original image and this one, they are pretty much alike except that the new one has 3 times more pixels in it, although we can't see much difference in this small thumbnail. |
And above is the detail. If you compare the original detail, and this one you should see the difference. |
4. Let's compare the images we produced.
|
|
|
The original |
No resized textures |
And resized textures |
While the third image produces the same overall impression as the original, we felt that our printout would benefit from the small details found on the letters of the second image. However we also liked the large chessboard in the original. The third image.
So here it comes. The time to use the third option Resize for objects (Label).
4. If you would like to resize textures only on the background object, open the Layer list to see what Label this object has. It has a Round-Rect label. Now you can change it while in layer list or leave it. As there is no other object with this name it's OK to leave it.
(In the sample 3dlights.rdw the Round-Rect is renamed to Chess rect)
Simply type the label of the object on the list below our third option. One object per line, if you need more objects. Note that this is case sensitive and must be the same as on the Layer list.
![]() Note: If the object has a Surface Skin then the Skin will be resized together with the texture. However in some cases if you need to resize only the texture and leave the Surface Skin in its original size simply specify -s after the object label.
Note: If the object has a Surface Skin then the Skin will be resized together with the texture. However in some cases if you need to resize only the texture and leave the Surface Skin in its original size simply specify -s after the object label.

|
|
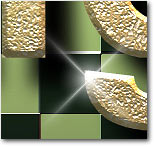
The large chess board is the background, and the text has a nice fine texture, although it's not very visible in this small thumbnail. |
Detail, Mega Render 3x |
|
|
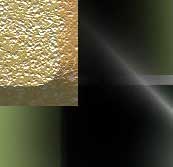
Detail, Mega Render 10x (4000 x 3000) This took around 6 minutes. |
Detail, Mega Render 3x, for more natural feel we added a Marble Surface Skin to the Round-Rect and render it in original size. (-s option) |
![]() Note: Resizing the design will not only multiply the size of the objects, but will also make any small errors and misalignments more visible. For example, two small objects that looked aligned on an original image may show themselves to be quite misaligned, when rendered to a larger size.
Note: Resizing the design will not only multiply the size of the objects, but will also make any small errors and misalignments more visible. For example, two small objects that looked aligned on an original image may show themselves to be quite misaligned, when rendered to a larger size.
The rendering may take several minutes depending on the complexity, lights used, packages and the Magnification Factor. And remember that all packages will be recursively rendered as well. Bevels, Lights and Shadows slow down the rendering most.
Generally you will be able to produce very large smooth images with lots of details, but remember that a large amount of memory is needed to create and maintain buffers while rendering.
Because these images are computer generated, they are usually smooth. That means there is no need to go to the extreme sizes. The image would look good in print even in smaller sizes.