|
Slicing Page, Rollover |
  
|
|
Slicing Page, Rollover |
|
HTML Slicer - Slicing Page, Rollovers
![]()
Continue with our Example
Since we learned how to use slicer lets continue with our Web page tutorial. We will create two types of rollovers - one by creating a Web Button object, the other one directly in HTML Slicer.
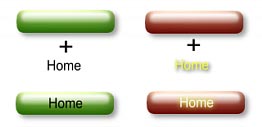
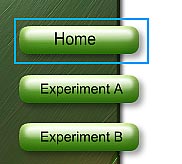
Last time we successfully created pill-shaped button
![]()
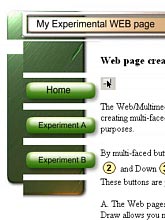
Now let's create whole page. We will add few elements and copy 3 times our button.
You may notice that we didn't add any text to our button. We did this so we can reuse the button.
We can of course add the text inside the package for each frame, which will take longer to change it or as here we will just put text on the top of the Package, not inside it. This way we don't have to worry about replacing the text in packages for each frame and the effect is still good.
![]() Trick: The text adding on top of Package will obviously not change, just the image of button behind - this may be OK for now.
Trick: The text adding on top of Package will obviously not change, just the image of button behind - this may be OK for now.
If you, however would like to change also the text, here is a trick: You don't have to put the text into the Package - you can just simply add Over frame to the text while it is still sitting on the top of the button, then change it accordingly!
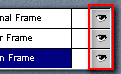
The text and the button package will run in sync, just try switching All frames (the Eye buttons):
Here it is: We didn't add the text inside Package, instead we add it on top of it and make it also a button by adding Over frame.
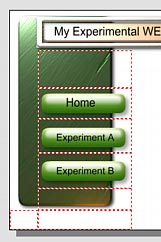
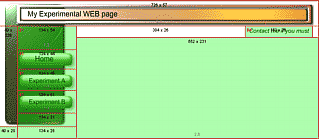
Now if we know all this, lets design the page, this is what we come up with - very simple Experimental page.
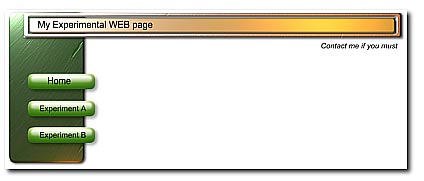
Only the 3 buttons are WEB Button objects, all the rest is just graphics.
Start Slicing
![]()
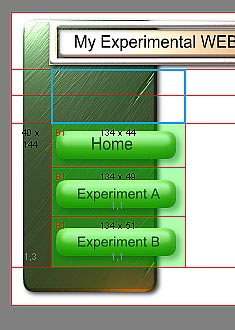
Open the HTML Slicer and with the Slicer Tool draw rectangle around our first button.
Continue with remaining buttons the same way.
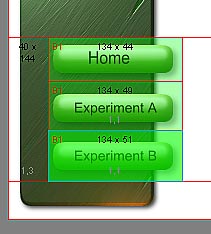
Now we have created Active Cell over each of the three buttons.
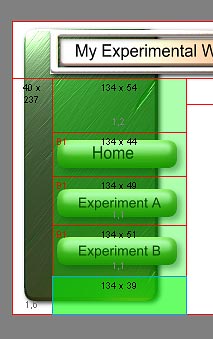
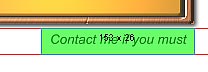
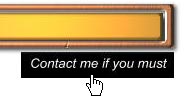
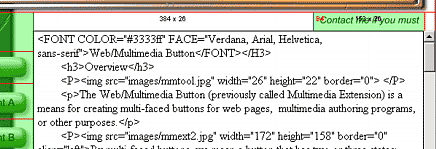
On the graphics we added another text in the right corner for contact. While it isn't a button we can still of course add link to it. First draw Active Cell around the text:
Now this will add too much unnecessary slicing on top. To keep design simple and to create space where we can type text in our HTML editor we added also another Active Cell (but we don't plan to ad any link to it) on top of the buttons. Let's do the same on the bottom of buttons and look on the slicing - a large area got opened on the right of the buttons - a great space to later add text of the page.
|
|
We can achieve similar results by drawing a large Active Cell on the area where we plan to have the web page text.
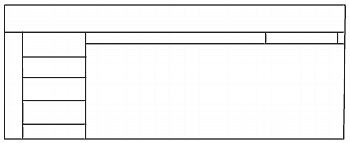
Anyway, lets; see the whole slicing design, for better illustration see also the line drawing on right.
|
|
This is how our page will be sliced-up. Pretty good.
Add Links, Rollover using Buttons
When you select any Active Cell, look at the top where are the cell properties:
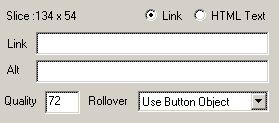
Please note that for cells created over buttons the Rollover is already automatically set to Use Button Object.
Now add the HTML link, it could be the whole http://www.somethig.com/somepage.html or simply mypage.htm if it is page on the site.
![]()
Now add Alternative text which will be shown as tooltip in IE.
![]()
You can also set different JPG Quality for each cell, or simply leave it default.
Rollover using Effects
Let's do the same for the Contact cell, which has not been created as a button just a simple text
We can simply add link and that's enough for the cell to be navigational but we can add Rollover effect even if the objects behind the cells are not buttons.
We simply choose one of the Effect as Rollover. Here we used Negative effect.
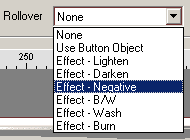
Real-Draw will create automatically the rollover with the negative effect for us. Many of them works very nicely on the page. This saves a lot of time for not-so-important elements.
Export our first Web page
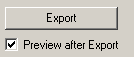
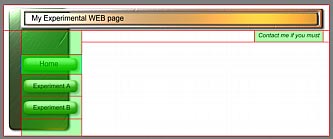
It is simple Click Export and choose location. The result will pop-up in your default browser:
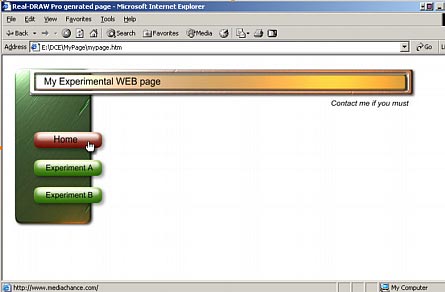
Let's examine it - all three buttons works, also the Contact Cell works - on mouse Over it will do negative effect:
Add Text
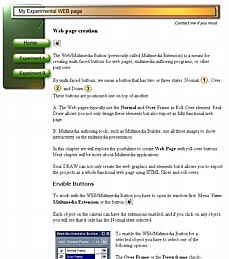
Now we can continue by adding text to the large area. One way would be simply stop here and open the created page in a html editor of your choice (Dreamweaver, Adobe GoLive etc.) and continue there by removing the large image occupying the cell and type text.
But we can also add a text directly in HTML Slicer!
For that we have to first draw rectangle with Slicer Tool over the empty area where the text should be
This will create new Active Cell. Now we will switch the cell to the HTML Text option:
![]()
This will enable us to write (or copy and paste as I did from some page of this manual) the text directly into that cell
Here you go, now export it!
You don't have to enter just plain text but whole HTML page. Imagine you already designed and approved a text with images and links in your favorite HTML editor. You can just copy the source and paste it all to the cell. The page would be then embedded in the result without need to switch between realdraw and your web editor.
Here we enter a whole part of another HTML page source code.
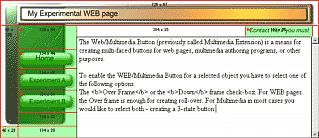
Broken HTML Tables
This above is all fine - if we type text which fits into the cell. If we add more text than the cell can hold our graphics table will be broken. If you ever designed web page you may already have seen this problem with your HTML tables. The bigger cell will stretch all the other cells:
This would not be problem if you have graphics only on top. But for such cases with surrounding graphics, this is a serious problem.
Not very pleasant but still easy to fix.
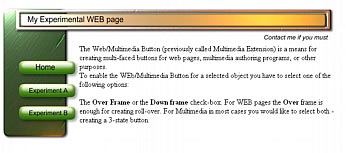
Extending Height of the page
The problem above is not hard to fix. Open the design in Real-Draw. Now before you go to HTML Slicer extend little bit the height of the canvas. (Menu Project- Size and Color)
Just little so we have some white space on the bottom without any graphics.
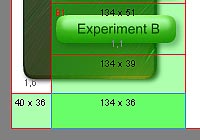
Now, go back to HTML Slicer and draw another cells in a new row which has no graphics behind it. It is recommended that none of the cells in the new row have any graphics - so we created two new Cells - one 40x36 to close the graphics above and the 134x36. (Even if we don't do the 40x36 it will work, but it is nicer this way)
|
|
So we created a new Cells on the bottom of page which has no graphics. Now look at the Extend Last Row check box, enable it and type long height - 1000 pixels or so.
This will extend the last row into that height (the underlaying graphics will not be resized - just the cells in HTML table) This will create enough room in the last row so the above graphics will be not moved.
Now you are able to type much longer text without breaking the design.
![]() Note: Even if we don't add the white Cells on the bottom of our design, it will still work as far as we have Set Cell Alignment Top-Left in Advanced properties. This will extend the last row but align the graphics on that row to the top of the long cells. It works, but adding white cells is a safer and more clean approach.
Note: Even if we don't add the white Cells on the bottom of our design, it will still work as far as we have Set Cell Alignment Top-Left in Advanced properties. This will extend the last row but align the graphics on that row to the top of the long cells. It works, but adding white cells is a safer and more clean approach.
Show Slices in design.
![]()
We can show the slices in design by checking this button on the main toolbar. This will put rectangles on places of Active Cells: