|
Pin Warping |
  
|
|
Pin Warping |
|
Unfortunately an offset misalignment is not the only alignment problem we will encounter if taking images by hand. A camera shake or movement is often more just an issue of horizontal or vertical offset. In most of the cases camera will also rotate slightly in the three dimension changing Yaw, Pitch and Roll angles.
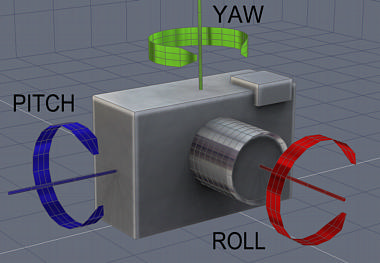
This may look somehow complicated already, but now imagine that the center of rotation for each angle is in real life hardly in the center of our camera as on our image. Very often it will be somewhere else, probably outside the camera body. Fixing for this would be normally impossible because we can't easily determine these data.
However we created a simple to use process called Pin Warping, that is unique because it can fix any of the camera movement and perfectly align even "stubborn" images.
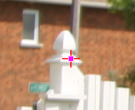
The basic idea is simple. Imagine the image is a stretched cloth. We align one part of the image, then Pin it down, move to another part of the image and then align and Pin it down as well. The Pins placed around the image will hold the particular offset at that place and gradually stretch, shrink or warp the image to fit into the offset at different pins.
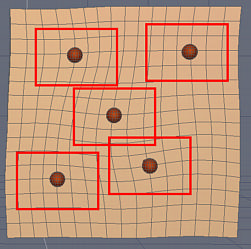
The Red balls are the pins, the red rectangles are our views. We see that as we align image at the center of each view, then pin it down and move the view to another part of the image and repeat, the image will warp and each significant part of the image will be in alignment.
The Actual process.
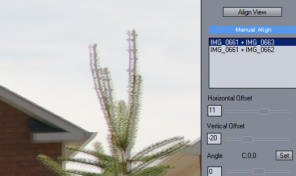
You can start from center of the image.
Align the image at the center with normal methods using Horizontal and Vertical offset. If you suspect a roll angle, you may try to adjust also that (however, it is better to use it only if there is a strong, visible roll of the camera)
Then Add our first Pin using the Add Pin button.
![]()
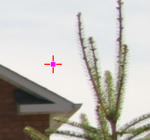
This will add the Pin to the center of image.

Now with the center aligned, move to other part of the image where the Image is no longer aligned because of the rotation - for example right edge.
You will see that the sliders are disabled and you cannot adjust the offset. As soon as you add a first pin, you are in Pin Warping mode and you can adjust the offset only at the places where are Pins.
You can do two things:
a) You can add second Pin before you can adjust the offset.
![]()
This will allow you to change offset at the pin position to align image once again.
b) Just press the Align View button that will add pin and then try to align the view.
![]()
Now we have second pin and second part of our image aligned
We can move to the previous pin with the Prev/Next Pin buttons:
![]()
The previous place (center) is still aligned as well as our new part of the image.
Now we will move to opposite edge and repeat the procedure: Add Pin, then Align or press Align View..
We will repeat this for other parts of the image if they still appear misaligned. Usually 4 - 5 pins does the job for normally misaligned image.
You can delete pin by moving the view where there is pin on image and pressing Delete Pin.
You can also Delete All pins which will return to a normal simple alignment procedure.
If you have another image in the set, you have to remember to align it as well. Depending on the situation, the second image may not need pins, or it may need pins on different locations.
This way you can produce perfectly aligned images.
Export Aligned Image (optional)
You can export each aligned image with Export Aligned Image button.
![]()
This is not necessary for the HDR production, but you may want to use the aligned images for different tasks.