About MediaChance
Products


?
Here are more features
•
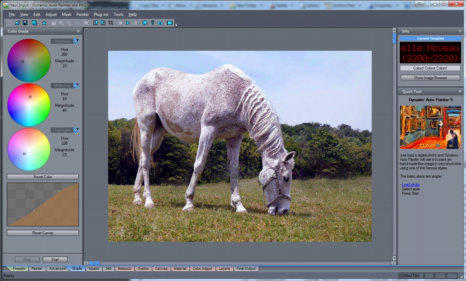
Grade Tab to fine color correct input image
•
Inpaint tab to fix and remove objects from the input image
•
Equirectangular 360 Panorama support
•
Leroy Color Randomizer
•
Internal support for Preset Folders
•
U-Paint Helper for aspiring real world artists
•
Art Tone
•
Link to Premium templates
•
Save layers as PSD
•
Tighter relationship between Color Adjust and Layers.
•
Reactor - preview of actual image in Edit
•
Two editions HOME and PRO
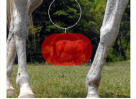
Inpaint Tab
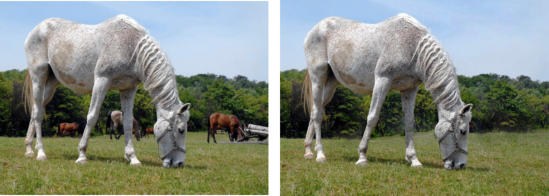
In older version there used to be "Remove Unwanted Parts" tool that was later removed (the irony!) as it couldn't keep up with any larger size images. This is a
rework of that idea with much more options. There are in fact 3 distinctive tools: the very effective Interactive Smart Patch Tools (for large elements) that can
seamlessly patch unwanted parts with any other image parts, Spot Auto Heal Brush (for small parts) that will replace small blemishes with surrounding patterns
and a simple Clone Brush known from image editing programs.
The Smart Patch will not only replace the selected part of image with another part, but also fit it there without obvious seams.
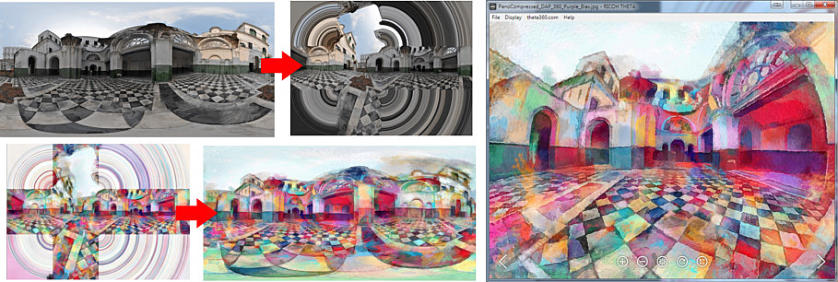
Support for painting 360 Panoramas (Experimantal feature)
With the popularity of various action and 360 cameras such as Ricoh Theta, Samsung Gear etc, we added support for the equirectangular panoramas (full 360
degrees) that the cameras produce. The problem is not exactly trivial, we can't just paint the 360 panoramas as they are because when viewed the brushes will be
distorted.
The Equirectangular images need to be first unwrapped into a cubic projection then paint and after that convert back to original state. This way the brushes when
viewed in VR or panorama browser will be equally sized regardless where we look. During painting in 360 mode the software has to respect the seams and do few
other tricks.
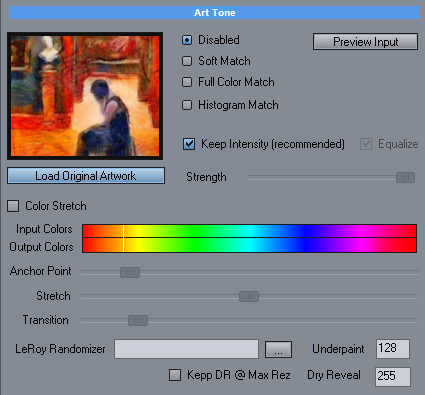
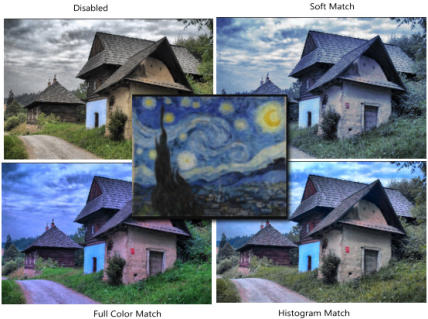
Art Tone settings in painting process
Art Tone is a continuation of Impressions - but this time they can be specified in the templates. This will paint the input image within certain palette. An obvious
usage would be to load palette from the painting from which the template was originally created.
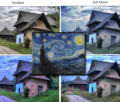
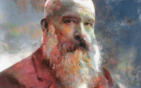
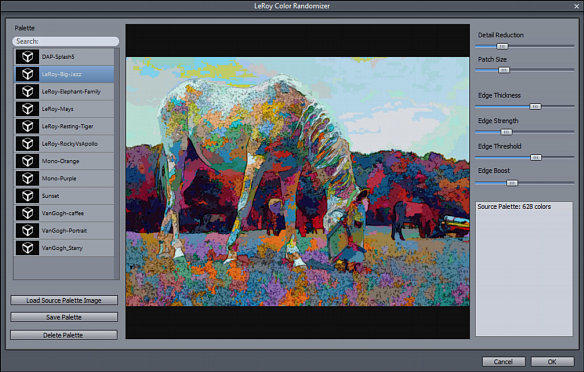
LeRoy Color Randomizer (menu Plug-Ins)
This Plug-in simulates the random colors used in for example Leroy Neiman paintings.
There are two uses: Directly changing input image before the painting (when used from within plug-in menu) or use in templates where the created Palette preset
can be recalled. When using from within templates there is much more control as you can specify how much the effect applies to underpaint and dry reveal.
(Example: Aquarelle Noveau) This way you can create spectacular colored images that still look right.
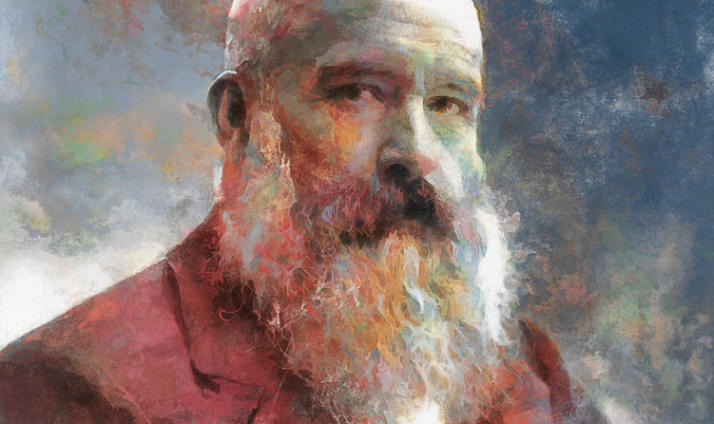
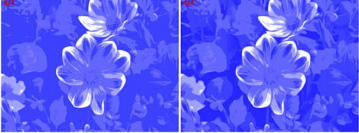
Using LeRoy effect on a black and white photo of Monet (leRoy preset)
Internal support for Preset Folders
The preset folders can now have Sub Folders (But you need to create them manually). The subfolders are meant to be for your own presets or imported
presets.The subfolders only work in the My Document\DAP\objectpack location. When you are saving your own preset or importing presets you can then
choose to save them into a created subfolder.
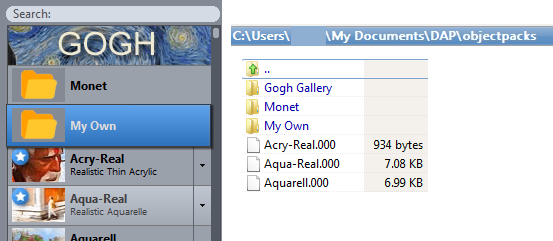
Note: The folders are not for moving or organizing factory supplied presets but for your own or imported creations. All factory presets are installed within
program folder (C:\Program Files\DAPPRO6\objectpacks\) but any changes you made are saved in C:\User\<name>\My Documents\DAP\objectpacks. DAP will
automatically show only one preset in the Preset Library if duplicates exist (the saved files in My Document Files have priority over the ones in Program Files).
If you start manually moving factory presets from Program Files to My Document subfolders every time you reinstall the software you will have them show in the
root again!
Don't manually move factory presets to subfolders or soon or later you will end up with duplicates when the update reinstalls the presets back to the root folder.
Save your own presets either in root or in subfolders (You can currently only create subfolders manually with file explorer in C:\User\<name>\My
Documents\DAP\objectpacks before you start DAP)
The subfolders will be enhanced in future versions with more direct functionality.
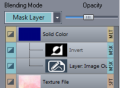
Save to PSD in Layers
This feature was removed from version 5 when new layer system was introduced and now we rebuild it for the new system and better! Unlike the Save Special in
menu File that saves the painting steps itself as layers in Photoshop(tm) file the newly added Save PSD saves each of the layers and masks into PSD file.
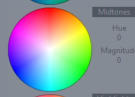
Each Shadows, Midtones and Highlights have separate color grade wheel. When you
click on the eyedropper icon, you can pick a color from image to compensate. This color
will be then used to color correct the particular tone (so if you pick in Shadows a dark
color that has red tint, the color wheel will compensate for it by selecting more
blue/green color so the particular selected tone will appear more gray.
The bottom graph is a curve graph that allows you to change the intensity and contrast of
particular areas. (For example lift dark areas)

LeRoy in template settings
This setting simulates the random colors used in for example Leroy Neiman paintings. The goal is that it would randomly use colors from a painting palette but
rearrange them such way that the image is still viewed correctly and the colors are non disturbing to the overall readability of the image.
It is up to you how strong you want the effect to be. It can be applied only partially and give an interesting tint and randomness to the colors. It can also recolor
black and white image an interesting (yet completely artificial) way.
Grade Tab
This is a quick way to apply non destructive color correction to input image.
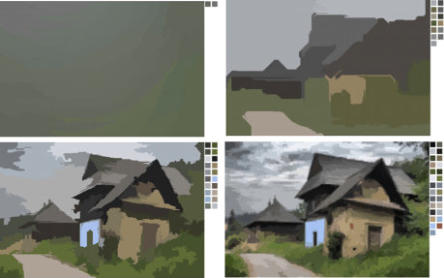
U-Paint Helper
This is a tool for aspiring artists. It breaks the painted image into steps or layers that can be then used while painting with real brushes and colors. It also
works on just an input image (which can be used if you already have exported your paintings previously). Since it uses Reactor it is infinitely customizable and
you can write your own process how to break image into layers.