|
Basic Brushes |
  
|
|
Basic Brushes |
|
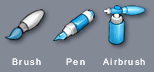
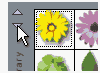
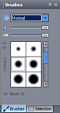
Shown above is the trio of basic brushes. Each brush icon will open its own library of predefined brush definitions.
Remember, the same rules apply with these as well as any other brushes.
| • | From the Color & Texture Bar you can choose Color, Color options, Texture, Texture-Color mix |
| • | From the Brushes Bar you can select the Brush (size, shape), Brush mode and Brush Opacity. |
You can get more control of each brush if you use a Pressure Sensitive tablet.

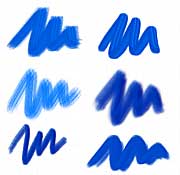
The image above shows examples of some of the basic brushes.
![]()
Rubber Stamp is a great tool for removing unwanted parts of an image, or adding something that wasn't there. It can clone from one part of the image (the source) to another part (the destination). It can even clone from one image into another.
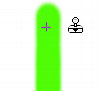
First, after you select the Rubber Stamp tool, you have to select the Source. This is the origin from where you want to start cloning. You can always select the origin with a Right mouse click on the particular section of the image, or when using it the first time after selecting the Rubber Stamp icon, even a left-click will select the origin.

The origin (Source) will be marked by a small cross. The next step is to click with left mouse button somewhere else on the image - this location becomes the Destination. Next, as you hold the mouse button down and move, the cross will move along with it as well. You will clone the part under the Source (the cross) to the Destination location.
In this manner, you can cover one area of the image with another part of the image.
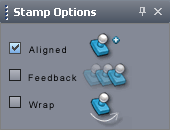
Rubber Stamp has a few options:
Aligned - the cross (the Source) will remain its distance from the mouse cursor (the Destination) even after you release the mouse. If you uncheck this option, the source will return to its original position as soon as you release the mouse. (that is, to the position where you right-click it)
Feedback - this option controls whether the source will also see the pixels you are painting at the moment, or the Source will not see it untill you release the mouse. See example.
|
|
|
We paint a line and then select the source in the middle of the line. Now we move the Rubber Stamp cursor on the right, click and drag to the right. |
With Unchecked Feedback, the cursor copy what is under the source, but without picking up the new pixels we are painting. |
With Feedback on, the Source also sees the pixels we are painting right now - so it performs the feedback, painting in a loop as we drag the mouse. |
Wrap - When the source goes outside of the image and Wrap is off, nothing will be drawn in the destination. If we set Wrap On, the source cross will appear on the other side of the image.
What is Rubber Stamp good for ?
Rubber Stamp is an excellent tool for retouching. Since everything repeats in nature - we can always find something to cover unwanted parts of an image without the image appearing retouched. The easiest patterns are in nature, a bit more complex patterns are man made - like bricks - where we have to align the Source and Destination very closely.
|
|
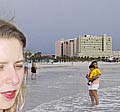
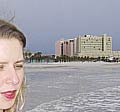
Removing people from backgrounds is easy, there is usually plenty of material around. Don't forget the reflections in the water! |
If we do the job right, no trails of retouching will be discernable even in extreme close up. |
Photo Montage
We can also use stamp to clone from one image into another. This is the best way to bring something from one image to another. We work the same way generally, but we choose the Source on one image and the destination on another.
For this retouching method to look natural, we have to choose images with similar light conditions and the same direction of light.
A Photo-Montage done with Rubber Stamp. We cloned the image from the left to the image on the right.
Using Stamp and Brush Cloning
This is different than normal cloning. See more info in Clone Tool.

A special collection of Brushes is available resembling the natural brush methods (Oil Paint), Artistic methods and 3D brushes.
The Natural and Artistic brushes gain a lot of power when used with Pressure Sensitive tablets.
Remember to check out all the libraries for this tool with Library Browser buttons on the Brushes bar.
There are many cool brushes here. Try some of the following: Oil Brush, 3D Pipes, Ropes... (You can easily fabricate your own specialized brushes for projects, and save them to your own personal library as well.)
|
|
|
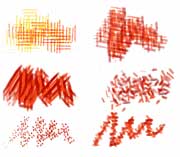
Example of Natural Brushes |
Example of Artistic Brushes |
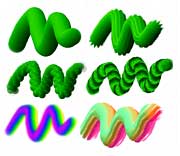
Example of 3D Brushes |
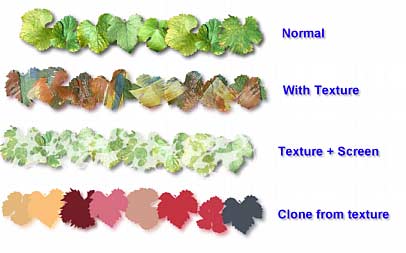
The Artistic, natural and 3D brushes are also perfect for a technique called Color Cloning. Read more here.

Image Nozzle is a special brush which sprays images. The Brushes for Image nozzle can have various options, it could spray the images in sequential or random order. It can also spray the images selected from a list by the angle of movement of the cursor. Each brush can have different settings.
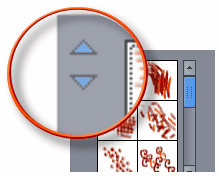
After you select the Image Nozzle tool you will see a default set of Nozzles in the Brush bar window. These are not all of the available Nozzles, you can check for other sets (from what we call the library) by clicking on the small Up or Down arrows near the left side of the library window. You can create any number of these libraries as well, and file them into the \Brushes\nozzle directory. PSP "Paint Tubes" are also supported in the latest version.
|
|
|
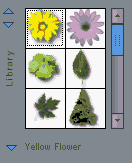
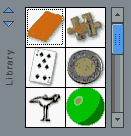
Default Nozzles in the Image Nozzle Tool. |
Click on the small arrow on the left side of the Library. |
Another Image Nozzle library will appear! |
You can always change or add to the Brushes in the library or create/add a new library.
Remember when adding a new library set into Image Nozzle (for example you download additional nozzles), The library (*.brs file) must be saved into the \Brushes\nozzle directory. See Brush settings for more info.
Besides normal drawing, Image Nozzles operate the same way as other brushes, and can use many other parameters. In the Brush Bar menu you can use Opacity slider to change the opacity, or you can use different Brush Modes. (Detailed Modes description is here)
In the Color & Texture bar you can add and mix the Nozzle with any texture, you can use Screen option or Clone. With these options you have unlimited ways to tweak the nozzles! See the Clone page for more details about cloning brushes.
See also Brush Settings.

Eraser works with the Undo command. When selected you can "paint" a previous undo step.
That is, if you made a mistake, you can press the ![]() Undo button, or if you want to just correct a part of it, you can use the Eraser to remove only the area you wish.
Undo button, or if you want to just correct a part of it, you can use the Eraser to remove only the area you wish.
Remember:
| • | The Eraser only goes one step back, so as soon as you make a mistake you have to stop painting and use the Eraser. |
| • | You have to do at least one editing step to the image in order to use the Eraser. |
| • | To return the image to it's original state, use Original Brush. |
| • | With standard brushes, Eraser doesn't change the brush library - it erases with the last brush you selected. When you paint with Image Hose or Artistic brushes it actually uses the Library from Rubber Stamp - which is a good mixture of hard and soft brushes to select from.(You can create your own custom brush as well, and add it to the library.) |
Fun with Hold Undo.
There is another command worth mentioning: The Hold Undo button.
![]()
Until it is pressed, the Image in the Undo buffer is locked and preserved. That means you can save an important Undo step for a while. When you Uncheck the Hold Undo button and use the Undo or Eraser command, it will use the saved buffer.
Note: When the Hold Undo is checked you can't use Undo, but (and this is important) you can use Eraser. Eraser will paint back the saved state of the image when you press Hold Undo.
You may not see it at this time, but there are many ways you can benefit from it.
When you are working with images on disk you have the Original brush (see Photo Retouch), so you can always go back to the original. With Hold Undo you can also preserve the step that you made any adjustment at, and you can switch between Eraser and Original brush to put changes back & forth.
Example:
|
|
|
|
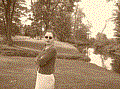
We load an image from the disk so the Original is automatically defined. |
Now let's make some adjustments to the whole image, here for example we used Sepia. |
Now It is the time to push Hold Undo Button so the Sepia image will be preserved in the Undo buffer even if we do something else. |
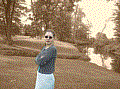
Now with Original brush "reveal" the original image. If you made a mistake, don't worry - you can paint back the "locked" Sepia state with the Eraser. |
When you finish, Uncheck the Hold Undo so normal Undo operations can work.
This simple command makes retouching much easier. You can have 2 "saved" appearances of the image. One is the Original (and you can set any step as Original with menu Image->Set as Original) and the other one is in the Hold Undo buffer.
Remember, if you don't press Hold Undo, you can still use Eraser, however, it then will work only on one step back, so you have to stop painting and fix the problem as soon as it appears.
When you have Undo on Hold, resizing of the image isn't a good idea, unless that's the effect you want to achieve, since the two images will be of different physical size.
![]()
Fill up the whole area with the background color and / or a selected texture.

This brush paints back the original of the image.
The original is defined when an image is loaded from the disk (such as digital photography). Original is not defined if you start painting into a new document, however, at anytime you can set or define a new original of the image from the menu Image > Set as Original. You can also paste a completely new original with Paste as original in the menu Edit.
You can use Original brush not only to regress if you make a mistake, but you can also try a reverse process, where you can apply the effect to the complete image and then paint back areas which shouldn't have the effect. See also Eraser tool for tips.
Example:
|
|
|
|
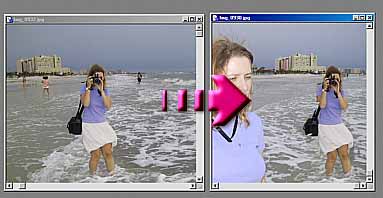
Open an image from your collection. |
Use Sepia from the menu Image > Adjust >Sepia |
Click on Photo retouch Tool and select Original Brush. Select a reasonable Brush Size from the Brushes bar. |
Paint over the person with the Original brush. If you make a mistake, immediately use the Eraser (Undo) brush to regress to the Sepia image. |